
Run your own PaaS with RunAbove and Dokku
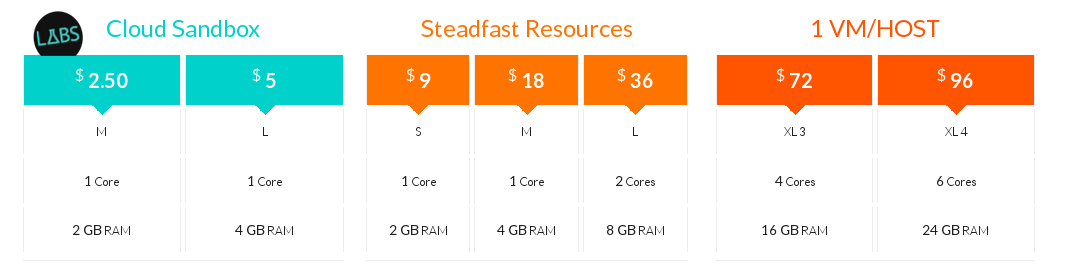
Last time, we looked at how we can run a Play application on Open Shift. Open Shift offers small instances (512MB memory) for free, but if you need more memory, it quickly gets rather expensive. For 1GB, the hour costs you 5 cents (that’s about 36$ per month). That’s too much for my hobby projects, so I started looking for alternatives. My requirements included 1GB of memory, a relational database that can hold more than just a few megabytes of data and ideally a deployment that isn’t any more work than a git push.
Unfortunately, I couldn’t find a PaaS provider that fit my needs, but I remembered reading about Dokku, the “Docker powered mini-Heroku. The smallest PaaS implementation you’ve ever seen”. Last week, I also learned about RunAbove, and that they not only offer really cheap machines, but also have pre-configured Dokku images (which I later realized isn’t such a big deal because it’s really simple to install):
If you search for runabove code on Twitter, you’ll find many discount codes that give you a $10 credit, so you can try this for free. After signing up, add a new instance:
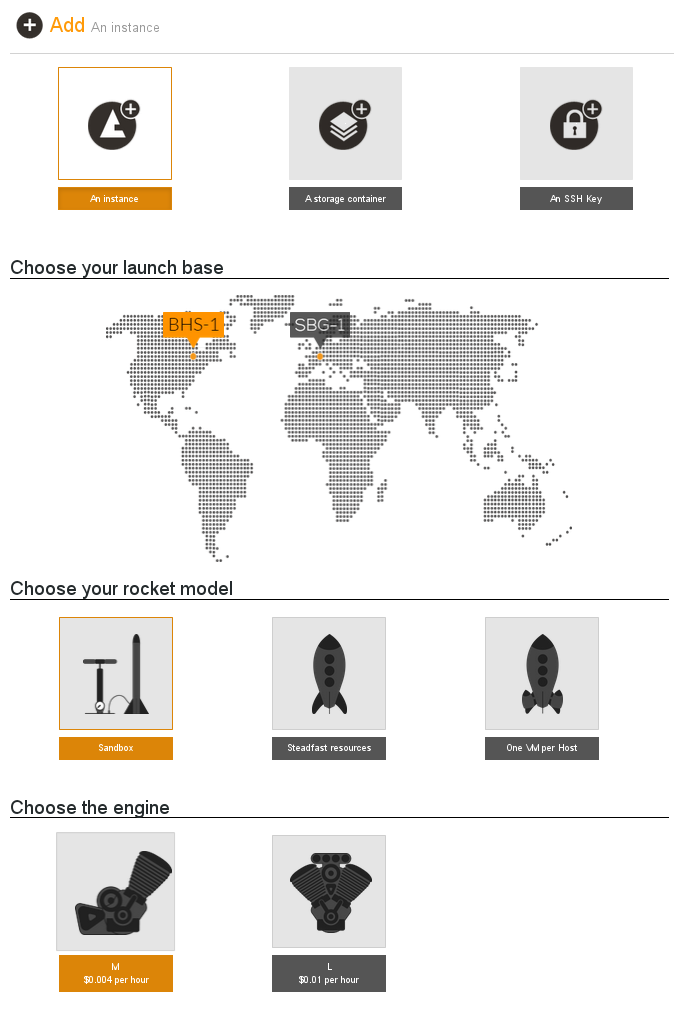 The next step will ask you for an image – choose Ubuntu 14.04 (we’re not using the predefined Dokku image because its version of Dokku is a bit dated) – an SSH key, a name, and a few seconds later your machine will be provisioned.
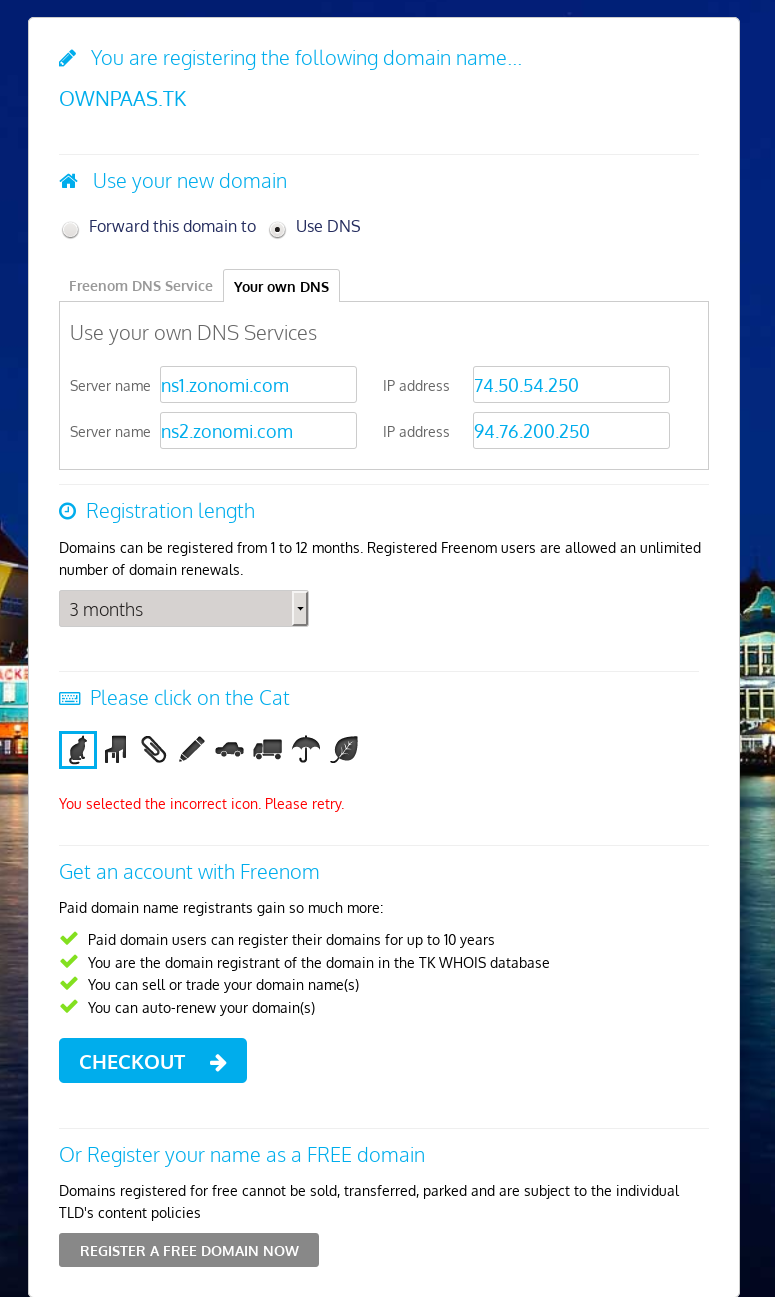
 One neat thing our PaaS will be able to do is hosting applications on sub-domains, without having to change any DNS entries. But for this to work, we first need a domain name and a wildcard DNS entry. Don’t worry if you don’t have a spare domain name lying around, you can get one for free at Freenom. During the registration, you can choose a custom DNS server. For example, Zonomi offers you one DNS zone for free and it allows wildcard DNS entries. Now, the setup of all this seems to resemble the chicken-egg problem: Freenom asks for the DNS server and Zonomi asks for the Domain, but in the end it all works out, just enter the configuration. I went with the domain ownpaas.tk (use the Register a Free Domain Now button at the bottom):
On Zonomi, setup your domain with a wildcard for the subdomains and enter the IP address of your RunAbove instance:
 After a few minutes, you can try to ping your domain and you’ll see that the address is resolved to the correct instance. The Ping won’t work though, because the default RunAbove network configuration doesn’t allow it. But you can ssh into your server now:
% ssh admin@ownpaas.tk
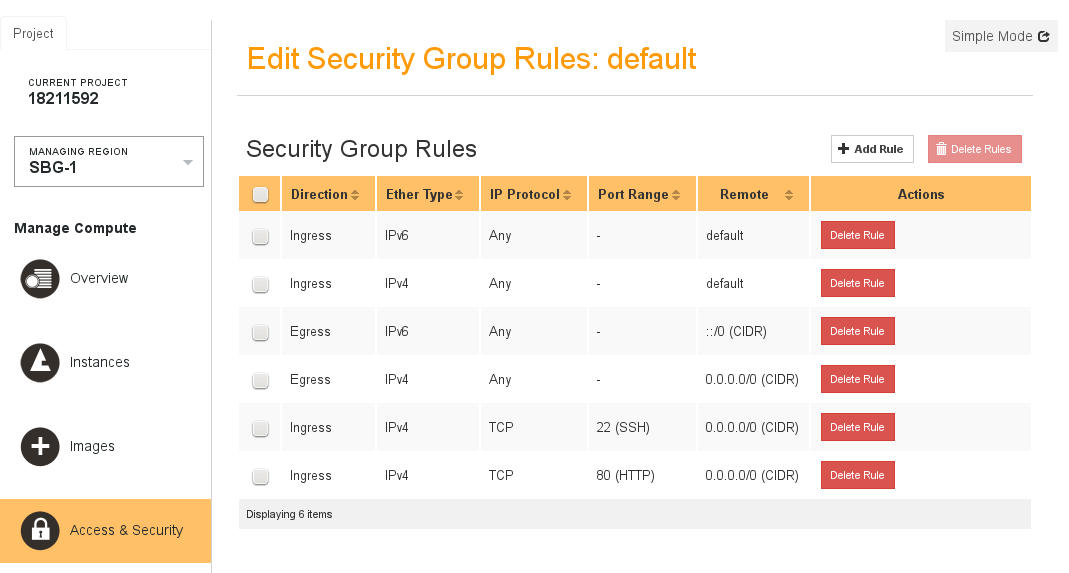
If you can’t, you need to inspect your RunAbove network settings. Switch to Expert Mode (in the top right menu), go to Access & Security and edit your default rules. There are pre-defined rules, just add the one for SSH and while you’re at it also for HTTP.
 The next step is to install Dokku. Just follow their instructions on how to install the latest stable version.
% ssh admin@ownpaas.tk
admin@my-own-paas:~$ # follow the instructions
...
Almost done! For next steps on configuration:
  https://github.com/progrium/dokku#configuring
If you don’t end up with the above message, just run the command again until you do. I needed three attempts… Now, we need to update the Buildpacks that Dokku uses. Buildpacks exist for many languages and frameworks and provide the framework specific configuration to Dokku (actually, they come from Heroku, but Dokku uses the same configuration).
% ssh admin@ownpaas.tk
admin@my-own-paas:~$ git clone https://github.com/progrium/buildstep.git
admin@my-own-paas:~$ cd buildstep
admin@my-own-paas:~$ sudo make build
Next, update the hostname so that Dokku knows how to deploy your applications to subdomains. Back on your local machine, copy your public key to the server and authorize it to use Dokku.
admin@my-own-paas:~$ sudo sh -c "echo ownpaas.tk > /home/dokku/HOSTNAME"
admin@my-own-paas:~$ sudo sh -c "echo ownpaas.tk > /home/dokku/VHOST"
admin@my-own-paas:~$ logout
Connection to ownpaas.tk closed.
% cat  ~/.ssh/id_rsa.pub | ssh admin@ownpaas.tk "sudo sshcommand acl-add dokku $USER"
Ok, now let’s create and deploy a Play application to our PaaS:
% activator new play-scala play-scala
% cd play-scala/
% git init
% git add .
% git commit -a -m "init"
% git remote add dokku dokku@ownpaas.tk:play-scala
% git push dokku HEAD
Counting objects: 30, done.
Delta compression using up to 4 threads.
Compressing objects: 100% (25/25), done.
Writing objects: 100% (30/30), 1010.68 KiB | 0 bytes/s, done.
Total 30 (delta 0), reused 0 (delta 0)
-----> Cleaning up ...
-----> Building play-scala ...
-----> Adding BUILD_ENV to build environment...
-----> Play 2.x - Scala app detected
-----> Installing OpenJDK 1.6...done
-----> Downloading SBT...done
-----> Priming Ivy cache (Scala-2.11, Play-2.3)... done
-----> Running: sbt update
...
-----> Creating non-ssl nginx.conf
-----> Running nginx-pre-reload
       Reloading nginx
=====> Application deployed:
       http://play-scala.ownpaas.tk
And that’s it! The domain name is determined by the name of the remote repository. Next time, we’ll deploy a slightly more interesting application that uses a database!